
How to Knap Flint
This article appears in the Spring 2009 edition of the Cahokian
Flint: n “ME.; AS. flint; akin to Norw. Flint, stone splinter; IE. Base *(s) plei-, to split (off), as also in split, splint, splinter, flinder, etc. 1- A very hard stone, a kind of quartz, which produces sparks when struck against steel, it is usually brown black or gray.2- a piece of this stone, used to start a fire, as material for primitive tools and weapons etc. 3 Anything extremely hard or firm like flint.”
(Webster’s New World Dictionary)
Knap (nap). v.t. & v.j. KNAPPED(napt), KNAPPING, M Scot; of direct echoic origin or <MLG or MD. knappen, of echoic origin, Dial.J. 1-to knock, rap, or snap. 2-to break or shape (stones or flints) by a quick, hard blow. 3-to bite sharply; snap; nibble.
n, Dial.J a sudden blow or stroke; rap.
(Webster’s New World Dictionary)
Have you ever seen a pane of glass that’s been shot
with a b-b gun? There’s a cone that pops out of the opposite side of the glass,
called the Hertzian cone.
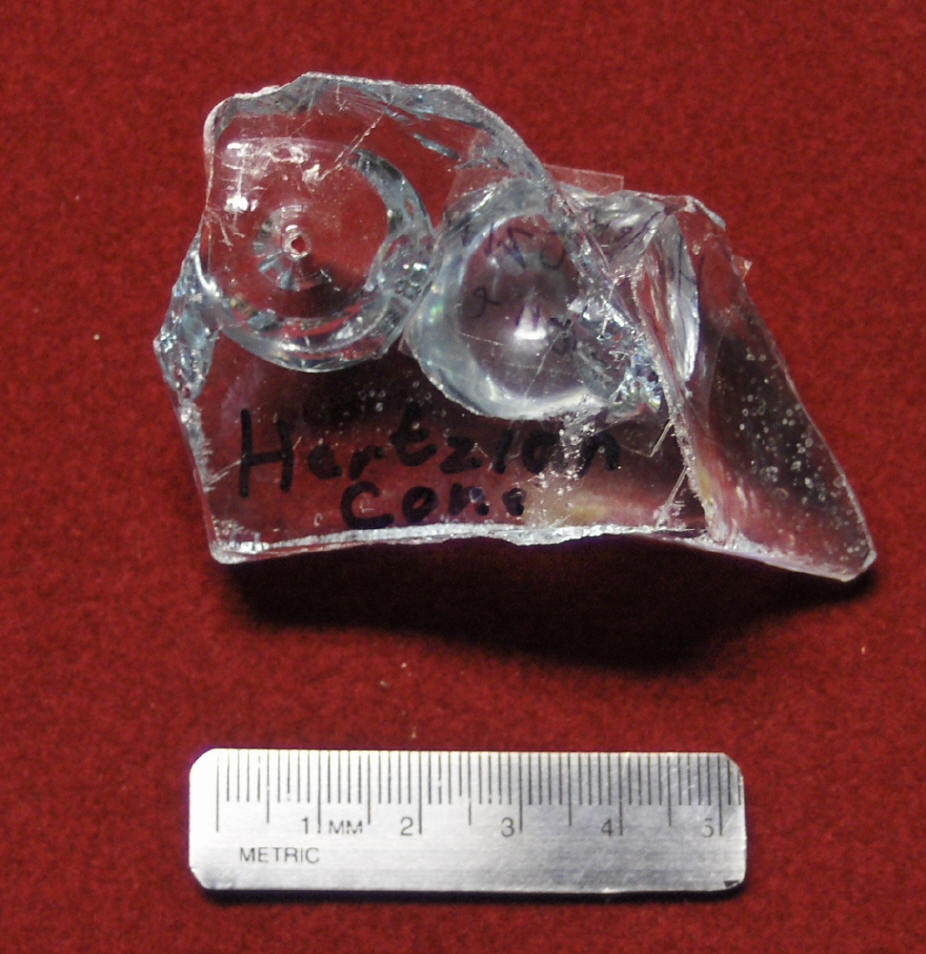
 That simple cone is the essential component of flintknapping because every flake
starts with that cone. Believe it or not, that cone can be manipulated. It can
be pulled, pushed, lengthened, shortened, and even bent to the will of the
knapper. Much of the manipulation is achieved by shaping the stone’s surface,
but others are achieved through the knapper’s holding technique, striking angle,
platform building, choice of material, knowledge of the material, proper
bracing, and accuracy.
That simple cone is the essential component of flintknapping because every flake
starts with that cone. Believe it or not, that cone can be manipulated. It can
be pulled, pushed, lengthened, shortened, and even bent to the will of the
knapper. Much of the manipulation is achieved by shaping the stone’s surface,
but others are achieved through the knapper’s holding technique, striking angle,
platform building, choice of material, knowledge of the material, proper
bracing, and accuracy.
Larry’s three basic rules of flintknapping are:
1) Surface Preparation
2) Platform Preparation
3) Accuracy
Those rules sound simple, because they are. It’s the application of those rules that’s so difficult. One of the goals of flintknapping is to maintain control. If you adhere, to the three rules with every flake, you will maintain control. Disobey the three rules, and you will lose control. The good news is, once control is lost, it can often be regained through experience. Here’s where some flintknapping terms should come in handy.
Step Fracture: A flake that terminates with a “step” or 90 degree break at the distal end of the flake, resulting in the flake not being totally removed.
Hinge Fracture: Almost the same as the step fracture, except the shock wave hits the mass at the end of the flake. Then, it bounces backward and outward making a “hinge” or rounded termination. This also results in the flake not being totally removed.
Note: steps and/or hinges are the enemy of the knapper, because they cause loss of width, length, or both. It is imperative that steps and hinges be avoided. That can be accomplished by following the three rules mentioned earlier.
More terms:
Billet: The tool used to strike or contact the flint. (stone, bone, antler, wood, copper, and/or others)
Bulb of Percussion: The place where the tool initiates the Hertzian cone. It can be found by following the concentric ridges on the cone, back to their source. Like the ripples in water, the source will be the smallest ripple. Sometimes the flake will snap and the bulb may be missing.
Uniface: A tool or piece of material that has flakes removed from only one surface. Most scraping tools are usually unifacial.
Biface: A tool or piece of material with flakes removed from both surfaces. Arrowheads, knives, chisels, adzes, spades, hoes, and other tools requiring some strength, are usually bifacial.
Percussion flaking: Striking the material with a billet to remove a flake.
Indirect percussion flaking; Using another tool (like a punch) between the stone and the billet.
Pressure flaking: Applying pressure to the edge to push off flakes with, hopefully, more control.
There are also safety concerns to consider when flintknapping. Flint flakes are very sharp, therefore safety glasses and leg pads should be used at all times. Flint flakes in the eyes are extremely dangerous. To avoid cuts legs should also be protected. A folded piece of buckskin or other soft material works well. Just make sure you have a large enough piece. It can be folded several times to prevent bruises by increasing the thickness of the pad. Band-aids are also an essential part of any knapper’s kit. It is recommended to wear jeans or long pants to avoid leg injuries.
Choose a piece of material that has a fairly smooth texture - the smoother the better. Check to see, if there are any natural convex surfaces on the stone. The convex surface should run from the edge of the stone inward, toward the center. If there are, that’s a good place to start. If there aren’t, you’ll have to make a convex surface. To turn a flat or concave surface into a convex one, start by driving off very small 1/8 inch flakes, then ¼ inch ones, then ½ inch ones. Remember that the flint is being struck from the top so that flakes come off the bottom. The increasingly larger flakes should create a convex surface on the underneath side. Once the surface from which the flake is to be hit is convex, the surface preparation is complete.
Platforms are the most difficult concept to grasp when flintknapping. Generally, the platform is the point at which the bulb of percussion and/or the Hertzian cone is initiated by percussion or pressure. The contact point should generally be below the imaginary centerline of the material’s mass and at a 45-degree angle to that same centerline. By striking below the centerline, the cone has less mass behind it, therefore the shock wave travels farther. Platforms are prepared upside-down and the biface needs to be turned over to achieve the correct striking angle. The platform should also be ground using an abrasive or granular material like sandstone or quartzite. Grinding dulls the edge so the billet can grab hold of some “meat” rather than crushing a super-sharp edge that has no strength.
3) Accuracy
Accuracy is simply hitting where you want to hit. This is not as easy as it sounds. During the early stages of knapping, platforms are usually large (from ½ inch to several inches from the edge), but in the latter stages, platforms may be tiny (as small as 1/64 of an inch). It takes a lot more control to hit a 1/64th inch platform than it does for a 1 inch one. The arc of the swing is very important, as is the power delivered through the swing. Flipping the billet, toward the end of the swing, will increase head speed, thus increasing power. The billet should contact the platform on the edge and below the imaginary centerline of the mass. Most beginning knappers hit the material with only 1/3 or 1/4 the power needed. It takes time and practice to develop a consistently powerful and accurate swing. A good follow-through is essential to maintain power all the way through the material.
Why?
The reason surface preparation is so important for beginners is, even if the platform is ill prepared or the strike is slightly off, the flake will be removed “cleanly”. A “cleanly” removed flake will taper to a very thin edge on the distal end and will leave no steps or hinges. Remember how much knappers hate steps and hinges? Even if the flake wasn’t as long or deep as had been hoped, at least steps and hinges weren’t formed and new attempts can be made to remove the desired flake. If you have an ill prepared surface, on the other hand, it doesn’t matter how well the platform is prepared or how accurate you are. The flake will terminate with a step or hinge.
The ancient Egyptians and the Danes were masters at
surface preparation. They made “preforms”(thin bifaces) with perfect surfaces,
so their final flakes traveled farther without creating steps or hinges. After
shaping the surfaces with percussion flaking, they ground the entire surface on
an abrasive material like sandstone, until the surface was smooth and slightly
convex from one edge to the other.
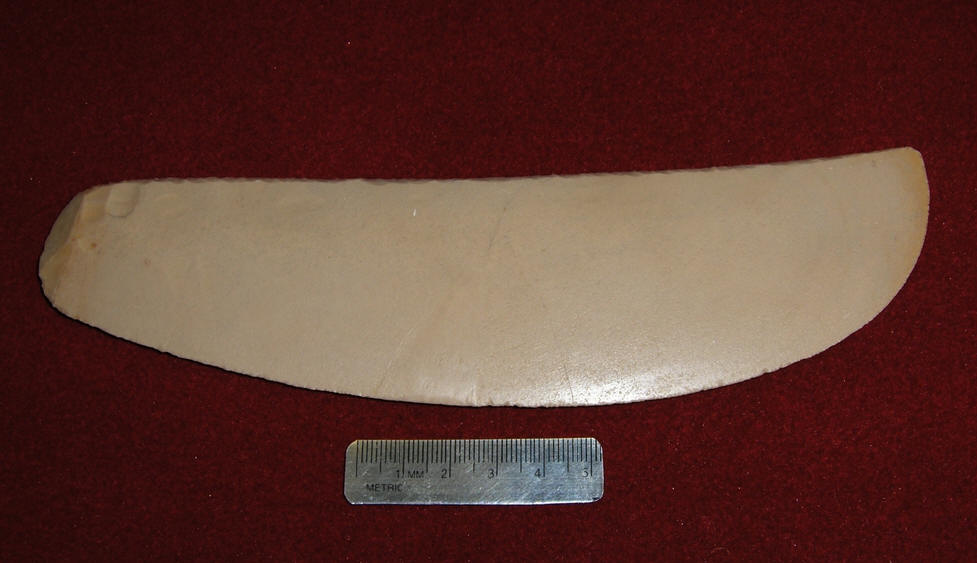 Platforms
were then built
Platforms
were then built![]() so pressure flakes could be pushed almost across the entire width of the stone.
so pressure flakes could be pushed almost across the entire width of the stone.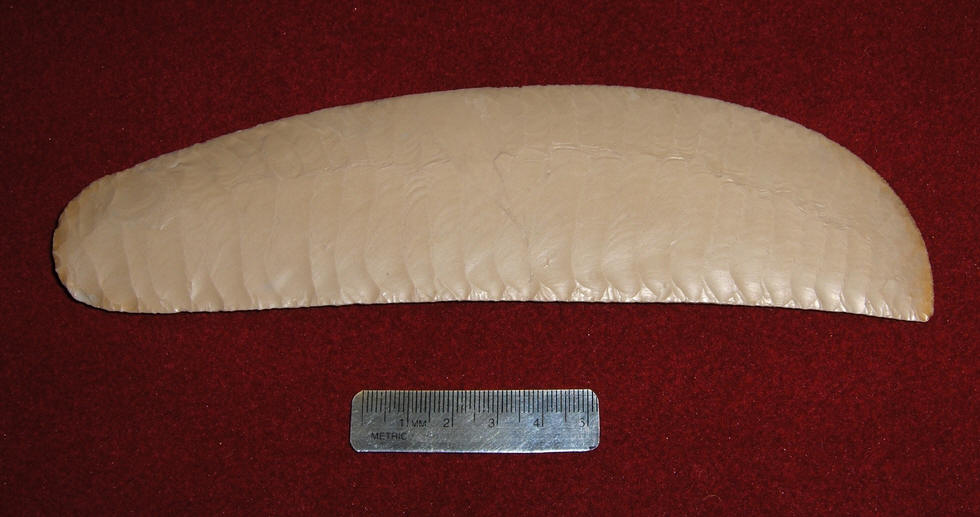 Today this process is called FOG (flake over grinding) and is used extensively,
by some modern knappers, to create some of the most beautiful and artistic
flintwork ever seen.
Today this process is called FOG (flake over grinding) and is used extensively,
by some modern knappers, to create some of the most beautiful and artistic
flintwork ever seen.
(The casts shown above are from the Lithic Casting Lab, Troy, IL.)
By now, everyone should be able to see that flintknapping is actually much more complex than it looks. Up until this point, we have only prepared the flake to be removed but haven’t really done any flintknapping at all. Making an arrowhead or tool isn’t necessarily flintknapping. Understanding, directing, and controlling the Hertzian cone is flintknapping.
Readers might be confused or have trouble picturing the procedures set forth in this article, and that’s why hands-on experience is the only way to learn the flintknapping skill. It cannot be learned from a book, but it can be explained through reading books. In other words, once you’ve had hands-on experience, you will understand what they were trying to say in the book.
It just so happens that there will be a new flintknapping class at Cahokia Mounds on Saturday May 9th, 2009, from noon until 4 PM. The instructor, Larry Kinsella, will furnish all safety equipment, instruction, tools, and materials. The class has a fee ($30.00) but all CMMS members, Cahokia Mounds volunteers, and students (with valid ID) will receive a $5.00 discount. To enroll, call Cahokia Mounds at (618) 346-5160 and ask to be placed on the roster for the class. Sign up early as the January class was very crowded, and the instructor has set a new maximum number of students at 20. All participants should be over 14 years old and wear long pants to prevent injury to the legs.