
(up-dated 11/Jan./12)
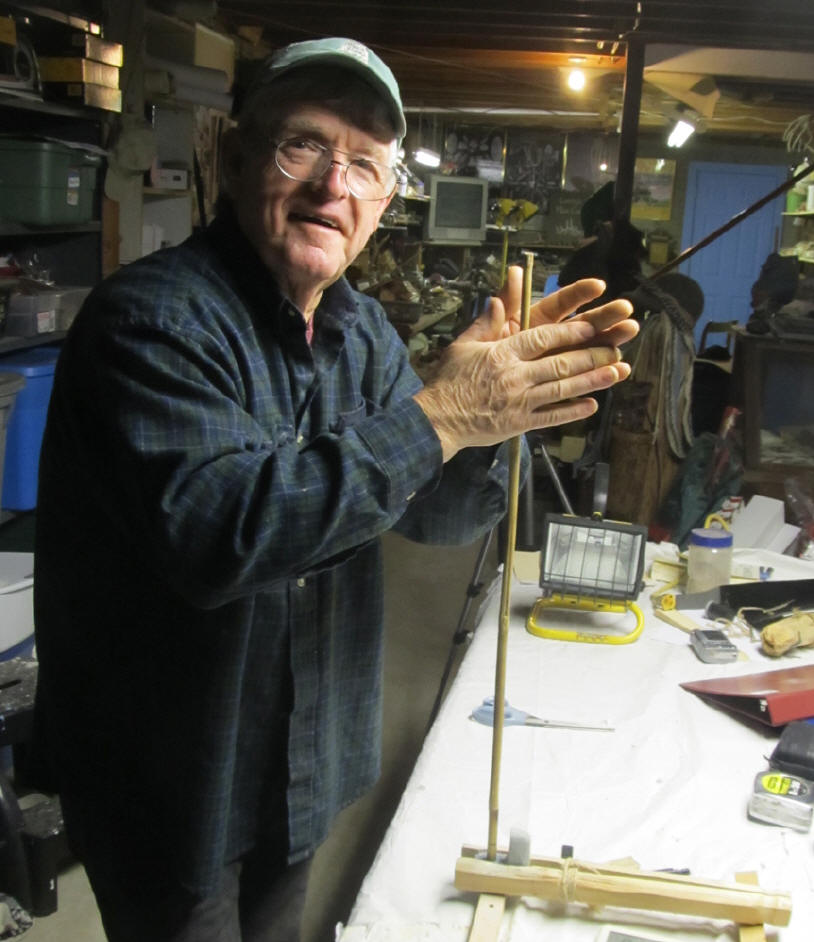
Larry continues his geniculate bannerstone drilling, after a 3-year delay. He's drilling the banded slate using a river cane (Arundinaria gigantea) core drill and ax-making debris/dust for the grit. He starts, by gluing a small template to the top of the bannerstone (or, in this case, the vise), to hold the grit in place. It needs to be held there long enough to create a depression deep enough to hold the cane drill. Then, the template can be removed.
Following, are step-by-step photos and videos of the experiment.
30/August/2009
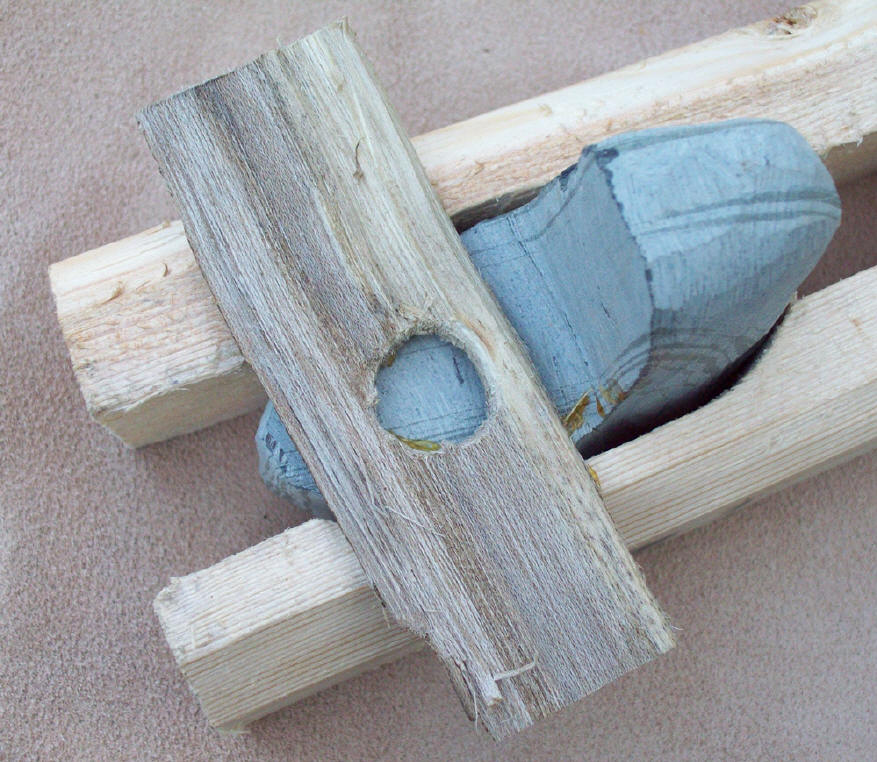
This is Larry's make-shift
vise with, the bannerstone preform and template, attached.
![]() It was attached using commercial hide glue.
It was attached using commercial hide glue.
 The template was drilled using a chert micro-drill, set in a
cane handle. The hole's diameter was enlarged, using a chert reamer. The
micro-drill was similar to this one
The template was drilled using a chert micro-drill, set in a
cane handle. The hole's diameter was enlarged, using a chert reamer. The
micro-drill was similar to this one
![]() used in another banner drilling experiment. The reamer was a spall of raw
Crescent Quarry Burlington chert from Missouri.
used in another banner drilling experiment. The reamer was a spall of raw
Crescent Quarry Burlington chert from Missouri.
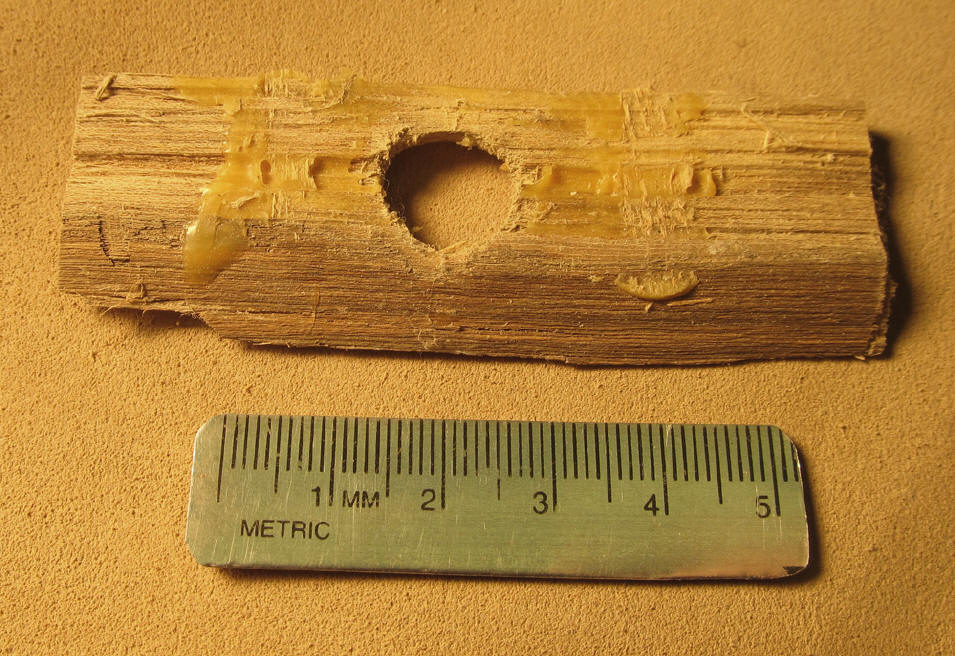
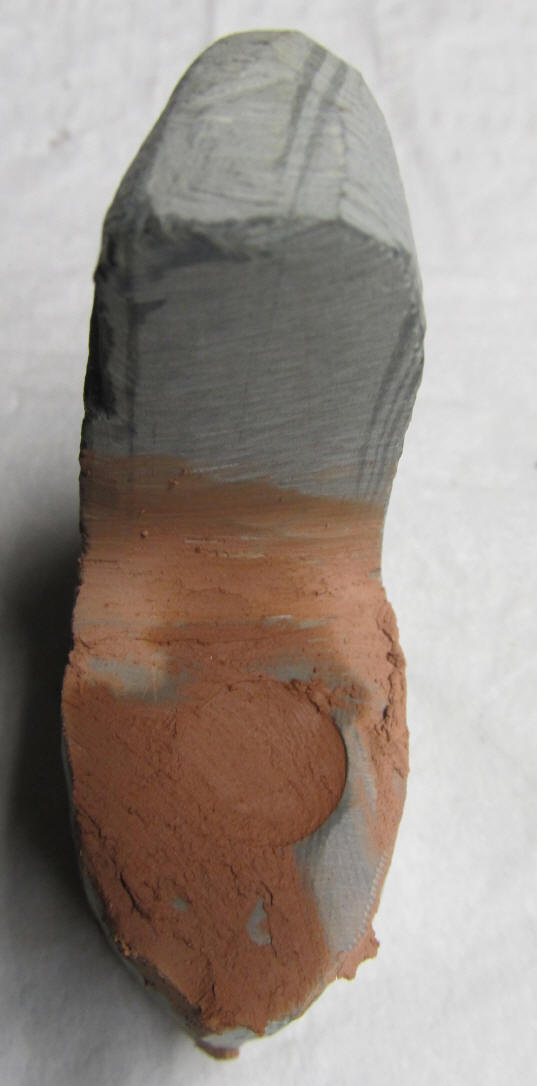
The template
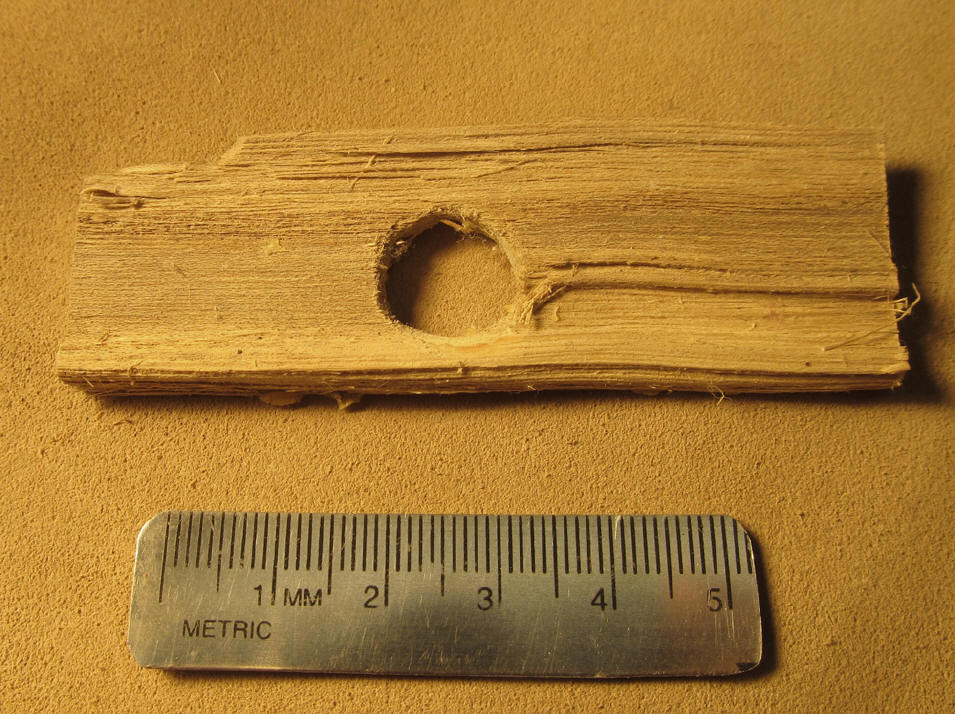 was a splinter of hackberry, from an earlier stone tool handle
production. It measured 7.8cm, long, by2.8cm wide, by 6mm thick. It was glued to
the genidulate bannerstone with commercial hide glue, while it was in a simple
vise.
was a splinter of hackberry, from an earlier stone tool handle
production. It measured 7.8cm, long, by2.8cm wide, by 6mm thick. It was glued to
the genidulate bannerstone with commercial hide glue, while it was in a simple
vise.
![]()
24/November/2009
The drilling grit needed to be
separated so it was winnowed, on a breezy day, like this.
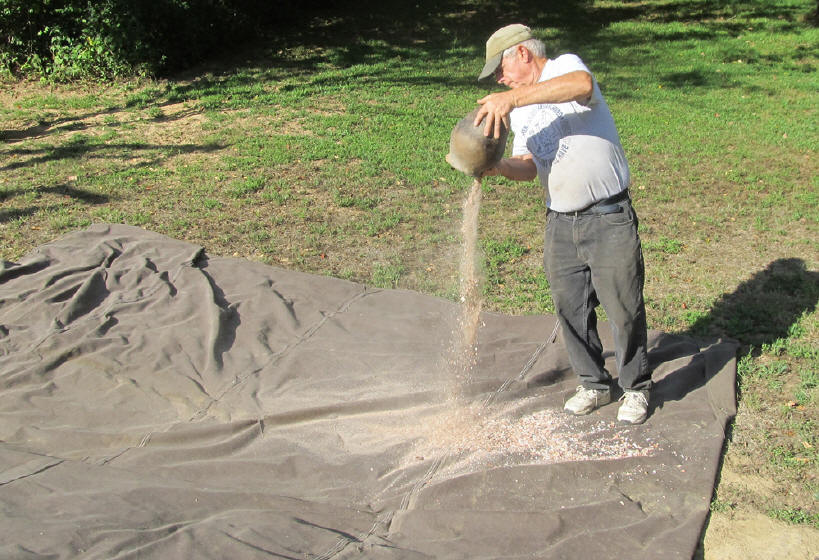 sSince Larry's
first bannerstone drilling, in the late 90s, used
winnowed chert dust, he wanted to try ax/celt-making debris to see if that would
work also. The material contained pieces of chert from the chert hammerstone,
used in ax making, but it also held bits of the basalt from the ax.
sSince Larry's
first bannerstone drilling, in the late 90s, used
winnowed chert dust, he wanted to try ax/celt-making debris to see if that would
work also. The material contained pieces of chert from the chert hammerstone,
used in ax making, but it also held bits of the basalt from the ax.
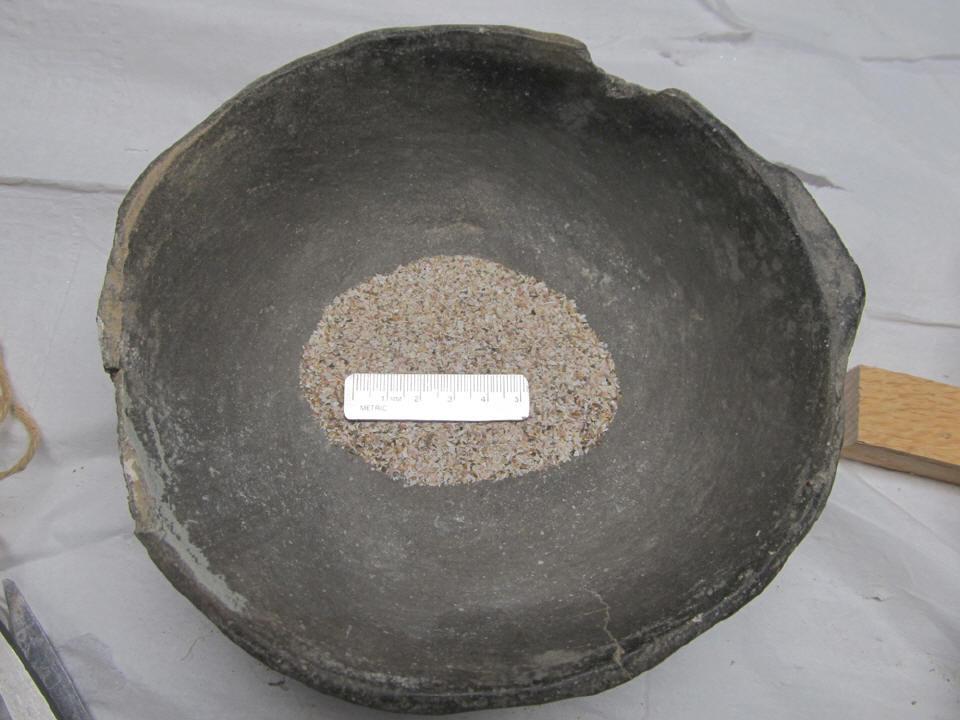
The grit was placed into a
pot, for easy access.
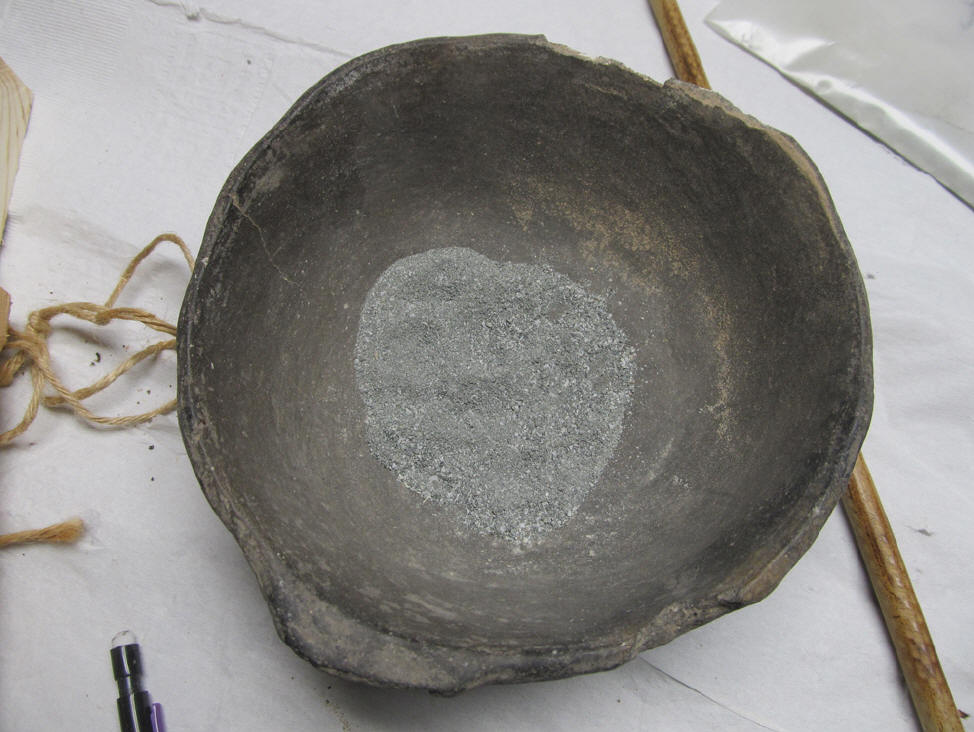 Here's a close-up of the grit..
The drilling was started by
placing about 15 grains of chert dust into the template, then rotating the drill
(55.0cm
long, by 12mm O. D.)
between his palms.
 The grit was replaced when the sound, of the drilling, seemed higher pitched and
it became apparent that the grit was getting dull. The grit replacement interval
ranged from 30 seconds to 5 or 6 minutes. At the10 minute, 57 second mark, it
was determined that the cane was a little too crooked and was hurting
Larry's hands so, it needed to be straightened. While bending the drill, it
suddenly snapped,
The grit was replaced when the sound, of the drilling, seemed higher pitched and
it became apparent that the grit was getting dull. The grit replacement interval
ranged from 30 seconds to 5 or 6 minutes. At the10 minute, 57 second mark, it
was determined that the cane was a little too crooked and was hurting
Larry's hands so, it needed to be straightened. While bending the drill, it
suddenly snapped,![]() so a new drill was fashioned, straightened, and put to use. The old drill had
lost 3mm of length at that point so the new drill's "tally mark" was made at
9.7cm from the end, instead of the 10cm, on the first drill. That way,
determining cane loss, would be more accurate. The drilling was continued to the
33 Minute, 15 second mark, where it was decided the hole was deep enough to
remove the template. The template was removed by pouring hot water over it, to
loosen the hide glue, and it separated easily. Here's the template with the hide
glue adhering to the underneath portion.
so a new drill was fashioned, straightened, and put to use. The old drill had
lost 3mm of length at that point so the new drill's "tally mark" was made at
9.7cm from the end, instead of the 10cm, on the first drill. That way,
determining cane loss, would be more accurate. The drilling was continued to the
33 Minute, 15 second mark, where it was decided the hole was deep enough to
remove the template. The template was removed by pouring hot water over it, to
loosen the hide glue, and it separated easily. Here's the template with the hide
glue adhering to the underneath portion.
Here's Larry's notes, behind
the preform and vise.
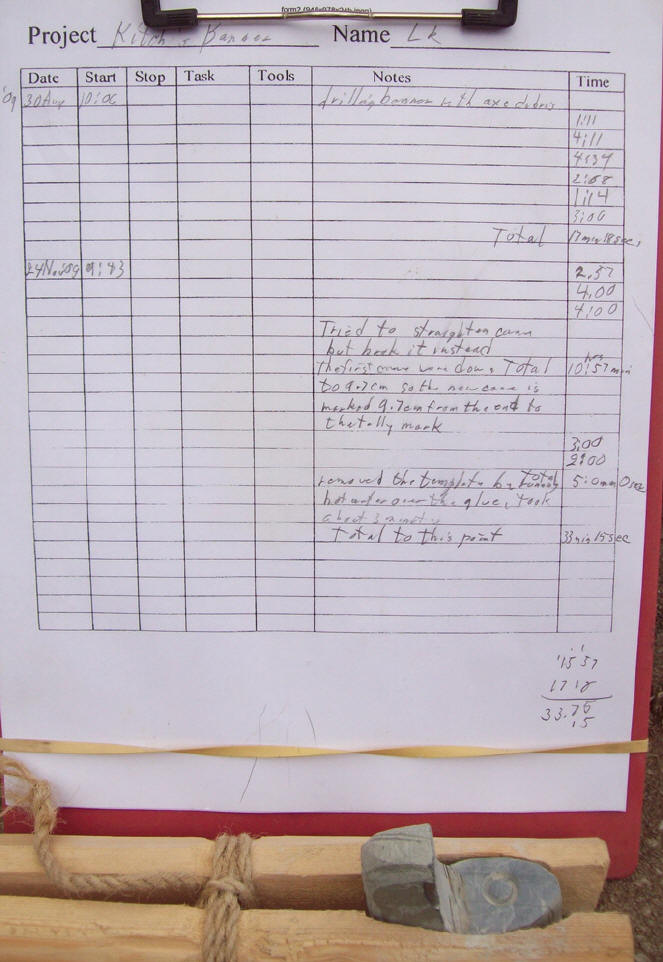 He uses a standardized form to accurately
record his notes.
He uses a standardized form to accurately
record his notes.
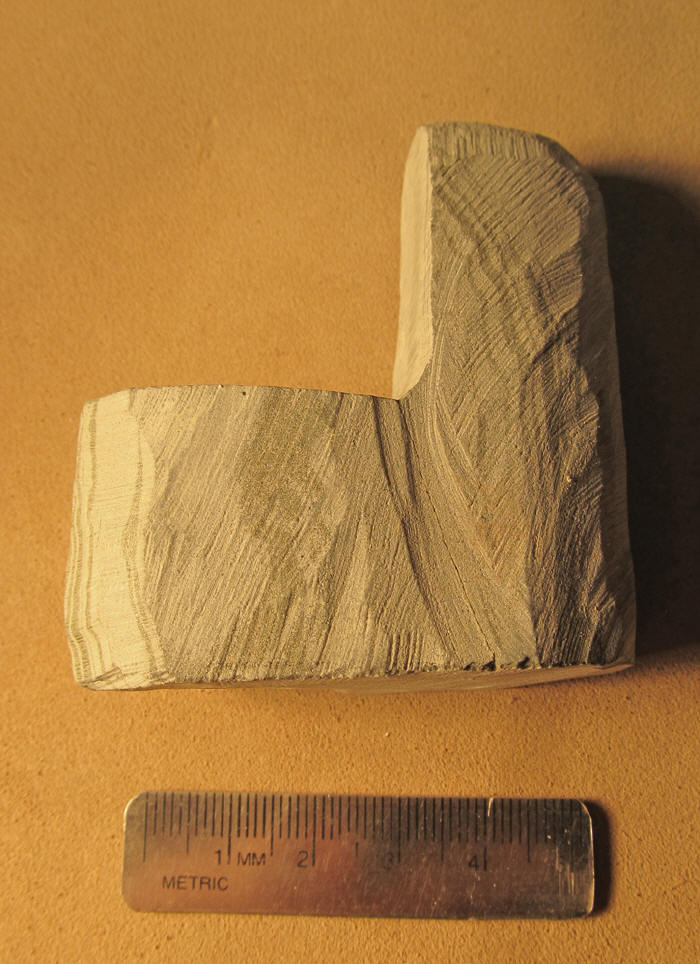
This
is a close-up of the preform, with the template removed. 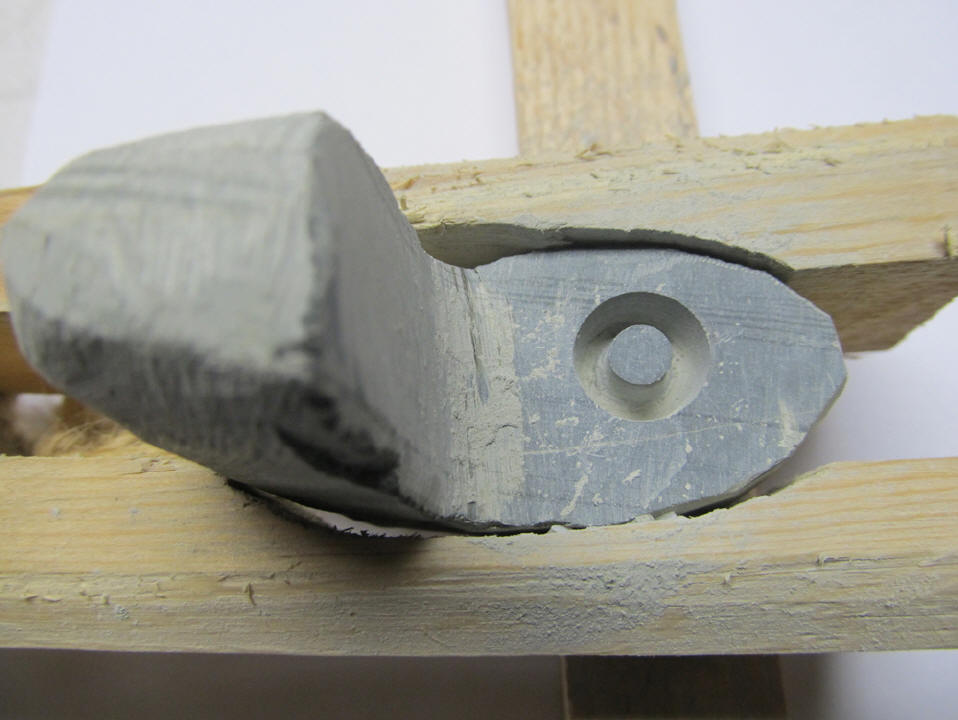
NOTE) During this period (Aug. 30th and Nov.24th, 2009) Larry was going through a bout of prostate cancer. He was treated with female hormones and radiation. His muscles had become extremely weak and it was very difficult for him to work efficiently. The experiment was laid aside with the intention to resume when Larry's health was restored. In 2012, he felt strong enough to make an atlatl for a dear friend. PJW's Atlatl That bannerstone drilling took over 10 hours, so Larry decided he was healthy enough to tackle the geniculate once again.
26/December/2012
So, the geniculate bannerstone drilling resumed on December 26th, 2012. The drilling resumed at the 33 minute, 15 second mark.
This is the video, made at the 33 minute, 15 second, mark. http://www.youtube.com/watch?v=fPW2uwK5AJY
 Here's a close-up of the original cane drill bit at the
33 minute, 15 second mark.
Here's a close-up of the original cane drill bit at the
33 minute, 15 second mark.
27/December/2012 The drilling proceeded (using the new cane drill) to the 59 minute, 15 second mark, where it was stopped to prepare for a video. Here's the video made at the 1 hour, 0 minutes, and 0 seconds mark. http://www.youtube.com/watch?v=jJZzKd2ZISI
At this point, the hole is 3.5
mm deep and we've lost 5mm of cane.
28/December/2012 The drill is still hurting Larry's hand so he sanded it a little and that seemed to help. At the 1 hour, 24 minute, mark the drill was smoothed more with sand paper to keep it from hurting the hands. the sanding did help a little. At the 1 hour, 30 minute, mark we had hole depth of 8mm and cane loss of 10mm. Since the hands were hurting garden gloves were tried but they simply wrapped around the drill and were of no use, so drilling continued bare-handed, after the 1 hour, 32 minute, mark.
The drilling seemed to start to angle to the front (it was being drilled with the vise running left to right) so, the vise was turned 90 degrees (front to back) and that seemed to help keep the hole upright and true.
This video http://www.youtube.com/watch?v=_v6WPMMIW1E was made at the 1 hour, 52 minute, 0 second mark.
This video was made at the 2 hour, 0 minute, 0 second, mark. http://www.youtube.com/watch?v=au_wG4E_S8Q
We now are at: 10mm deep, with
14mm cane loss, at the 2 hour , 30 minute, 0 second, mark.

At 2hours, 0 minutes, and 0 seconds we are at: 13mm deep with 19mm of cane loss.
This video
http://www.youtube.com/watch?v=HkjQhCLIeY0 is at the 3
hour, 0 minute, 0 second point and we have a hole depth of 14mm and cane loss of
21 mm
29/December/2012 At the 3 hour, 30
minute, 0 second mark we are: 16mm deep with cane loss of 26mm. It appears that
the ax debris is becoming less effective, so Larry has decided to use chert dust
![]() from this point on.
from this point on.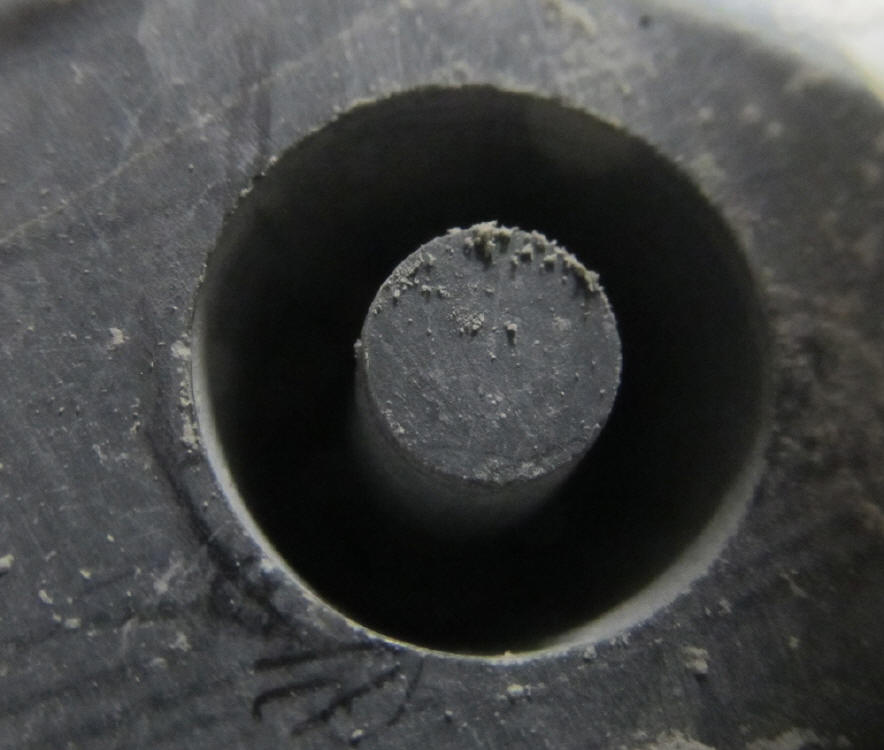
30/December/2012 Here we are
http://www.youtube.com/watch?v=_3bttEor5PM at the 4 hour
0 minute, 0 second mark, and we've produced a hole depth of 20mm and cane loss of
31mm.
At 4 hours, 30 minutes, 0 seconds, the hole depth measures 24mm and the cane loss is 35mm.
1/January/2013 Here's the video http://www.youtube.com/watch?v=s0dbwP-j6hQ from the 5 hour, 0 minute-0 second, mark. We have a depth of 27mm and cane loss of 41mm.
At 5 hours, 30 minutes, and 0 seconds, we have a depth of 28mm and cane loss of 45mm.
At 5 hours, 53 minutes, and 59 seconds, we have break-through!
This video http://www.youtube.com/watch?v=x9Ujv15hzHE was set up to watch the release of the core which took place at 5hours, 54 minutes, and 52 seconds.
26/January/2013
![]() Here are the two core-drills used in the
experiment. The upper one
(measurements above) broke when Larry
tried to straighten the shaft, and the lower one
(73.6cm long, by 11mm wide)
completed the first hole.
Here are the two core-drills used in the
experiment. The upper one
(measurements above) broke when Larry
tried to straighten the shaft, and the lower one
(73.6cm long, by 11mm wide)
completed the first hole.
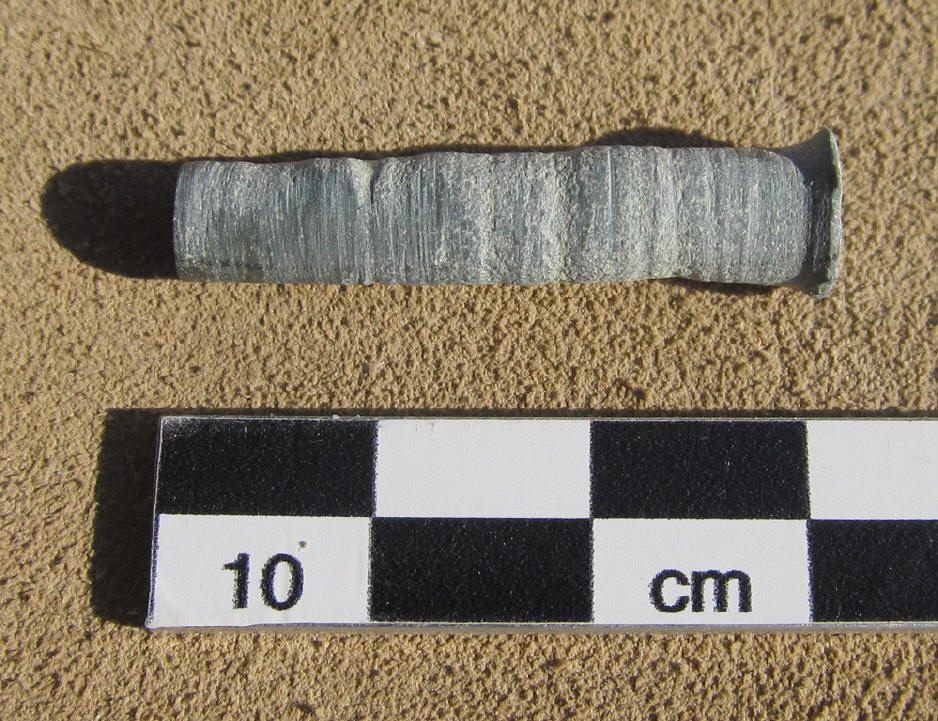
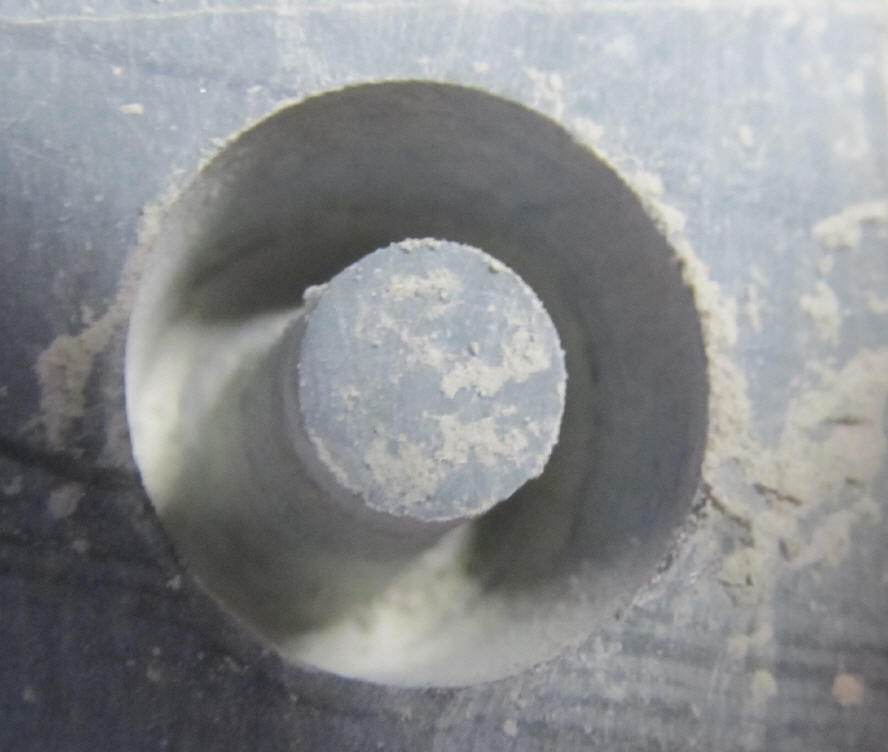
 These are pictures, of the core, removed
from the inside of the cane drill.
These are pictures, of the core, removed
from the inside of the cane drill.
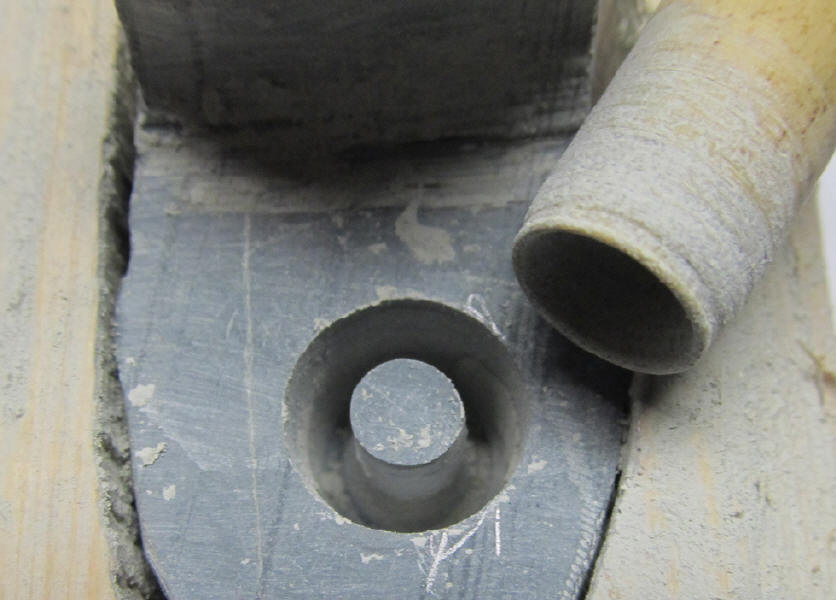
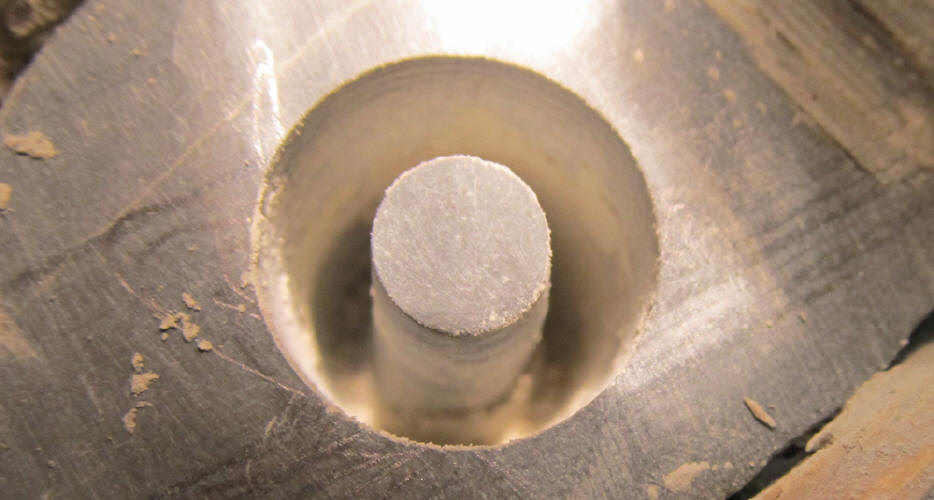
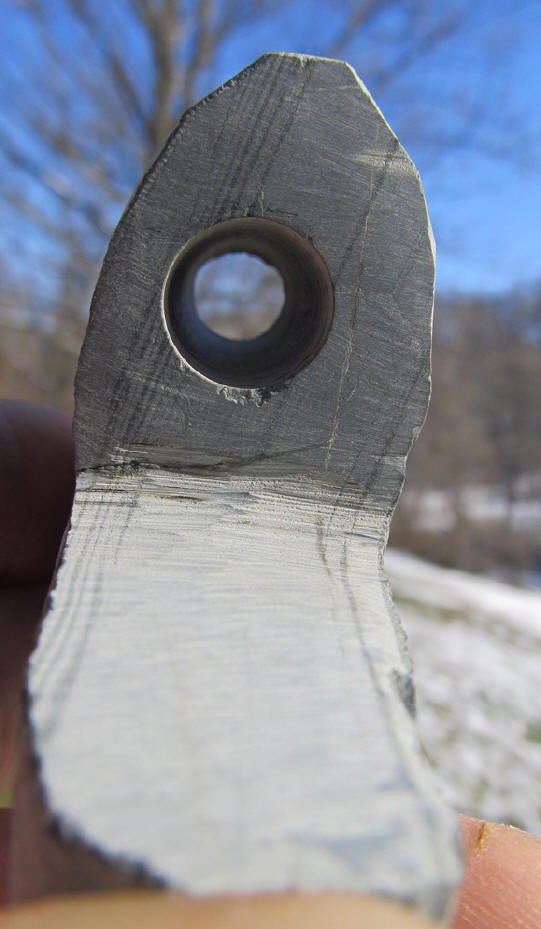 Looking down the "barrel" of the geniculate
bannerstone, after drilling had been completed.
Looking down the "barrel" of the geniculate
bannerstone, after drilling had been completed.
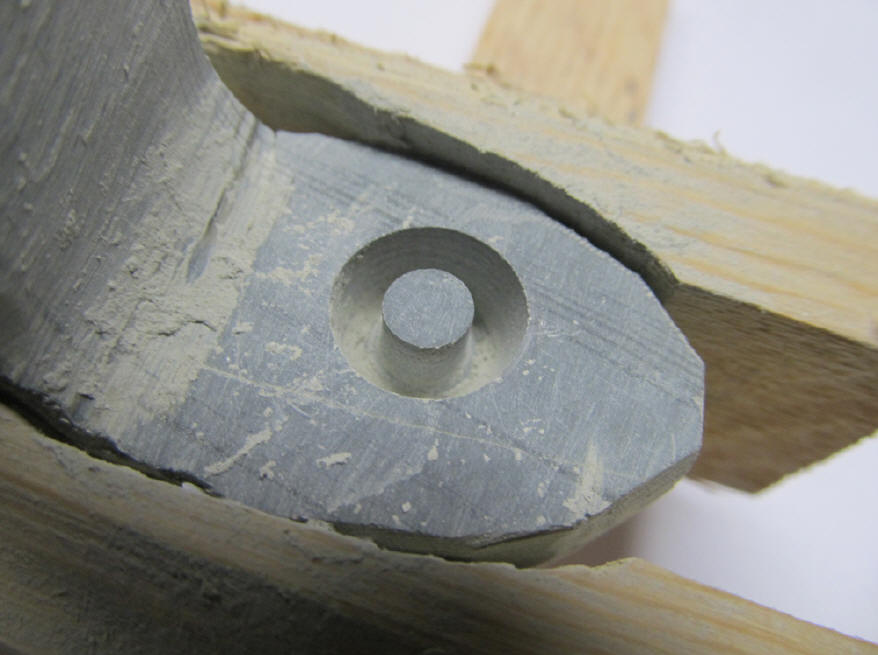
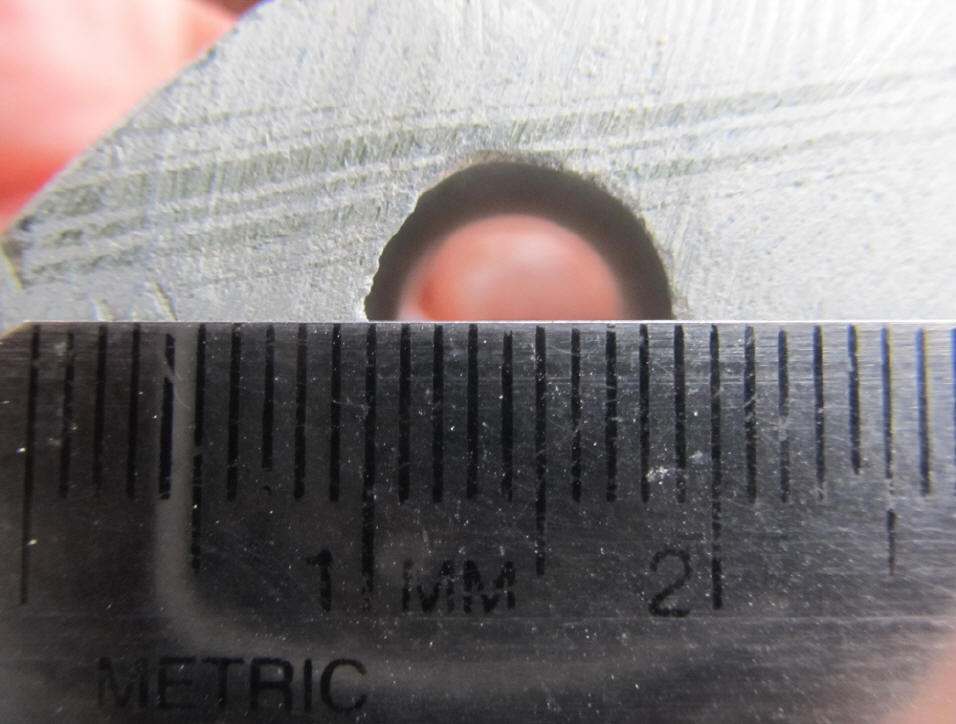 Measuring the hole at the bottom.
 ...and the top.
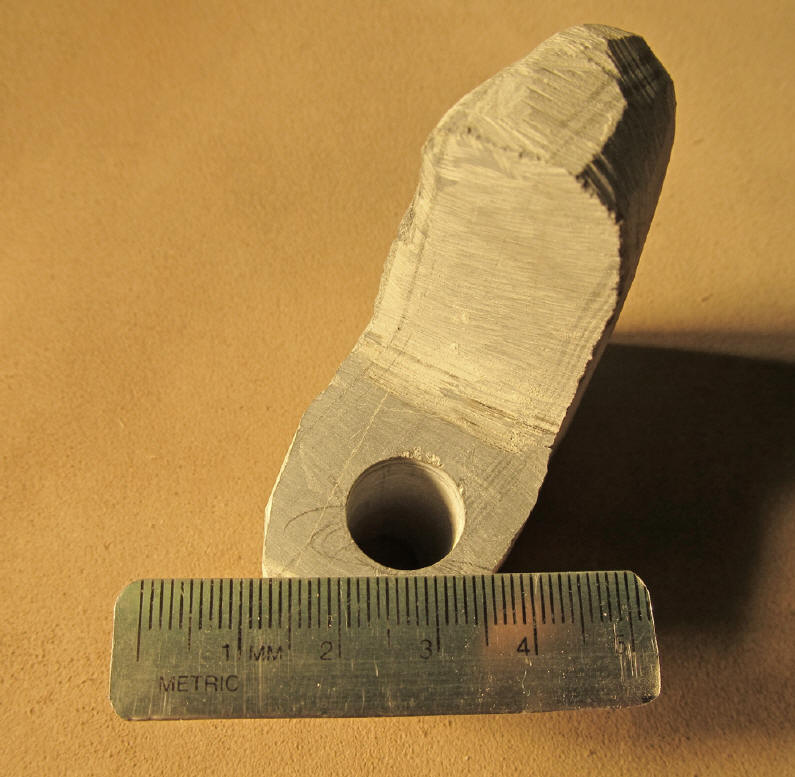
The bannerstone preform, after
drilling.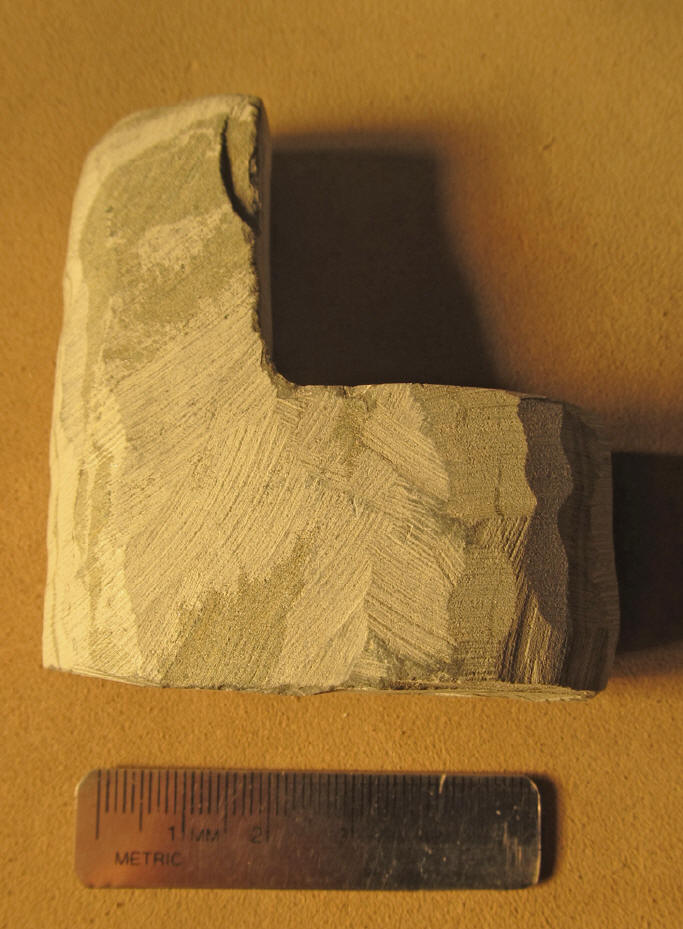
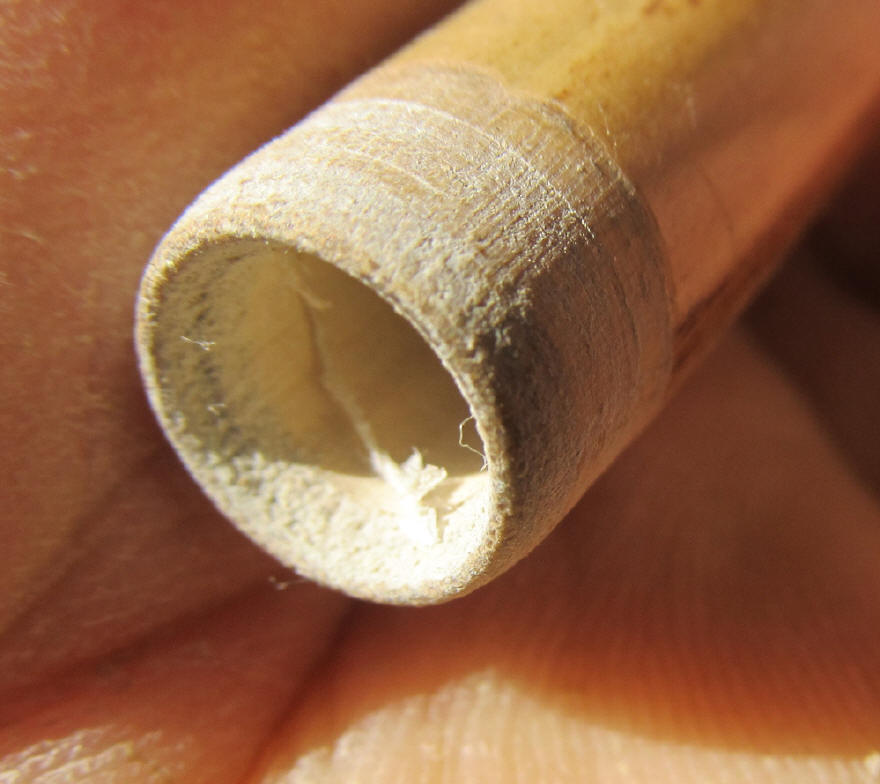
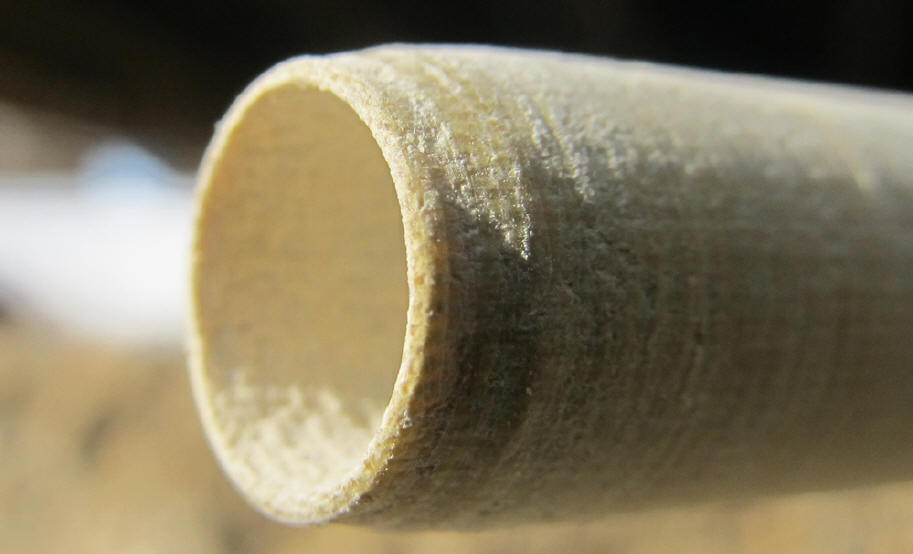
The end of the cane
core-drill, after drilling the hole.

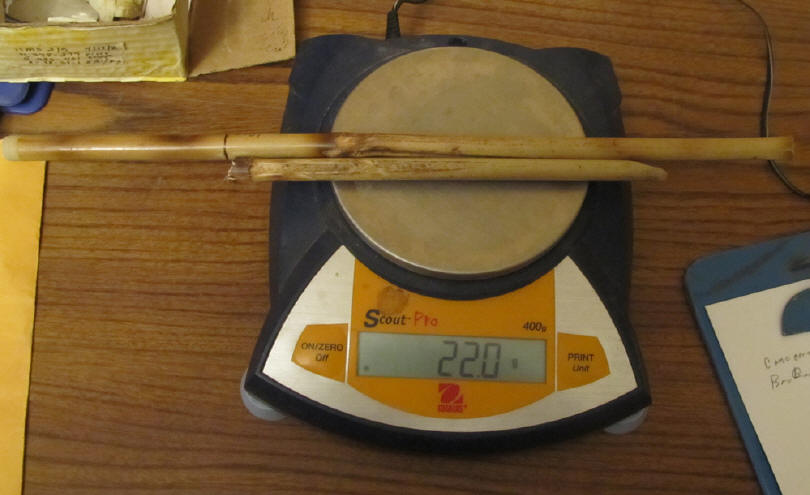 The first drill weighed 22.0 gr.
 The second drill weighed 30.3g, after use.
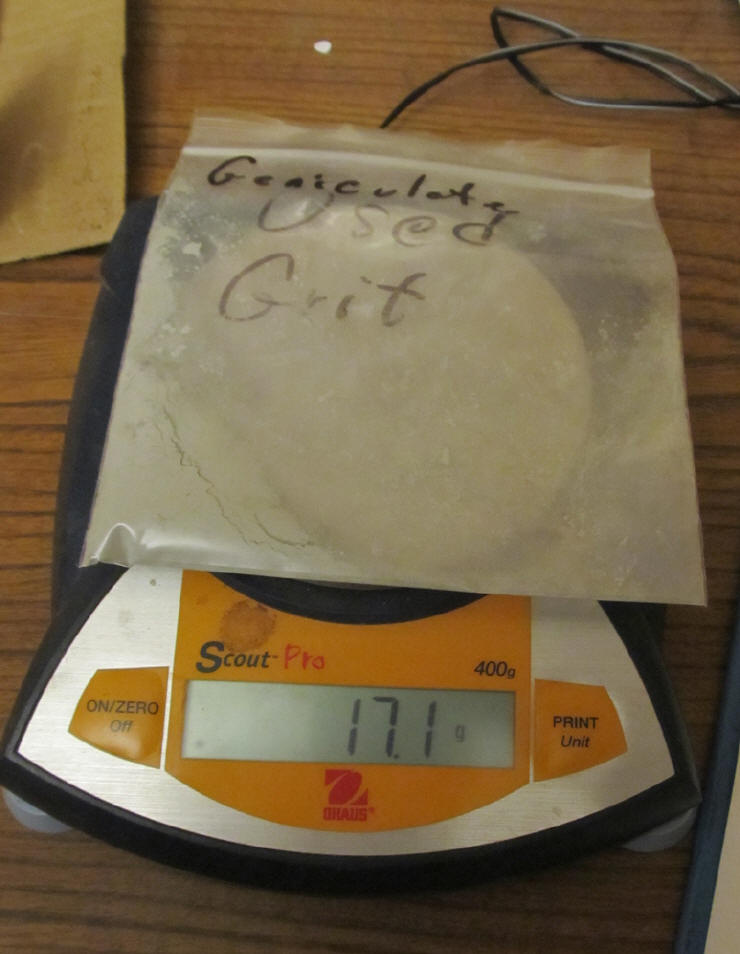 The ax grit debitage weighed 17.1 gr.
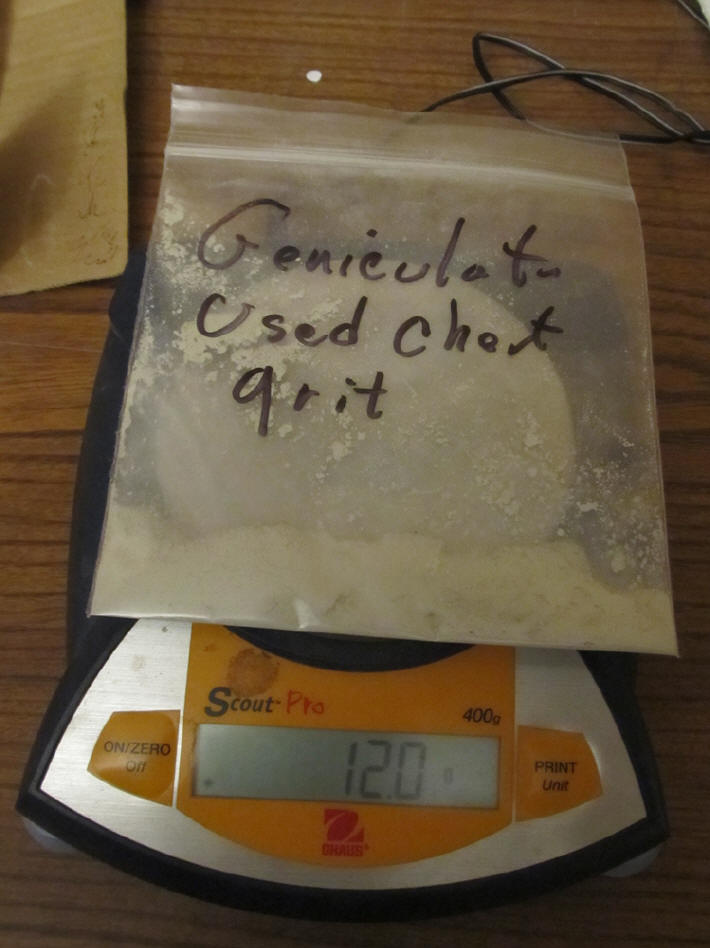 The chert grit debitage weighed 12.0 gr.
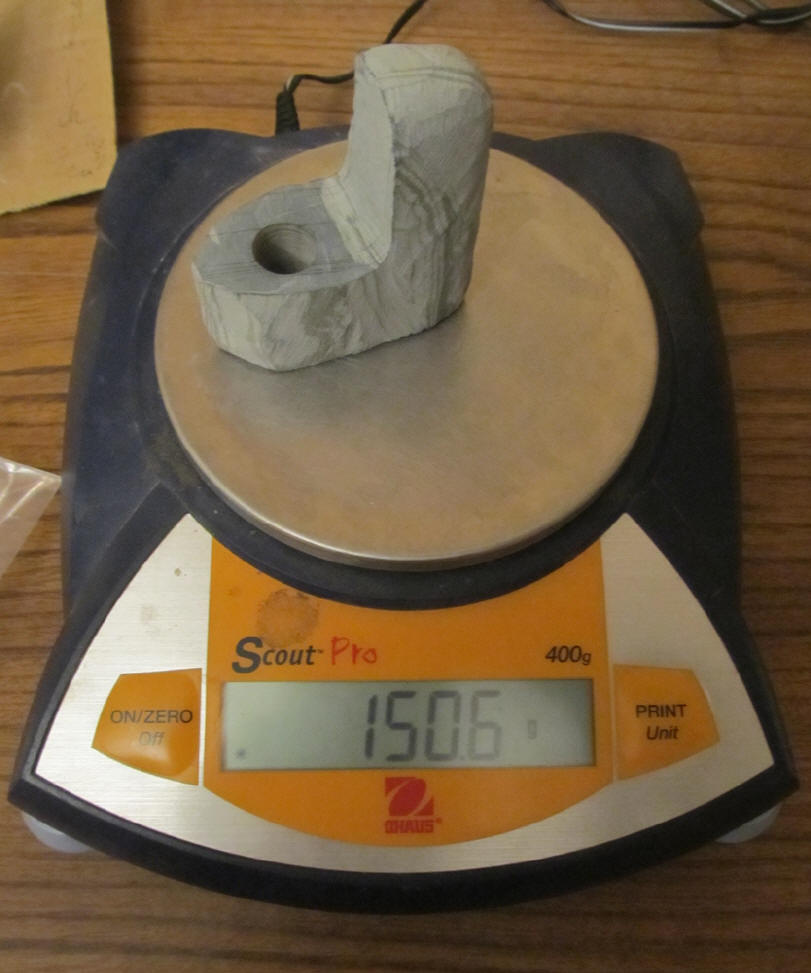 The geniculate banner weight, at this
point is 150.6 gr.
The geniculate banner weight, at this
point is 150.6 gr.
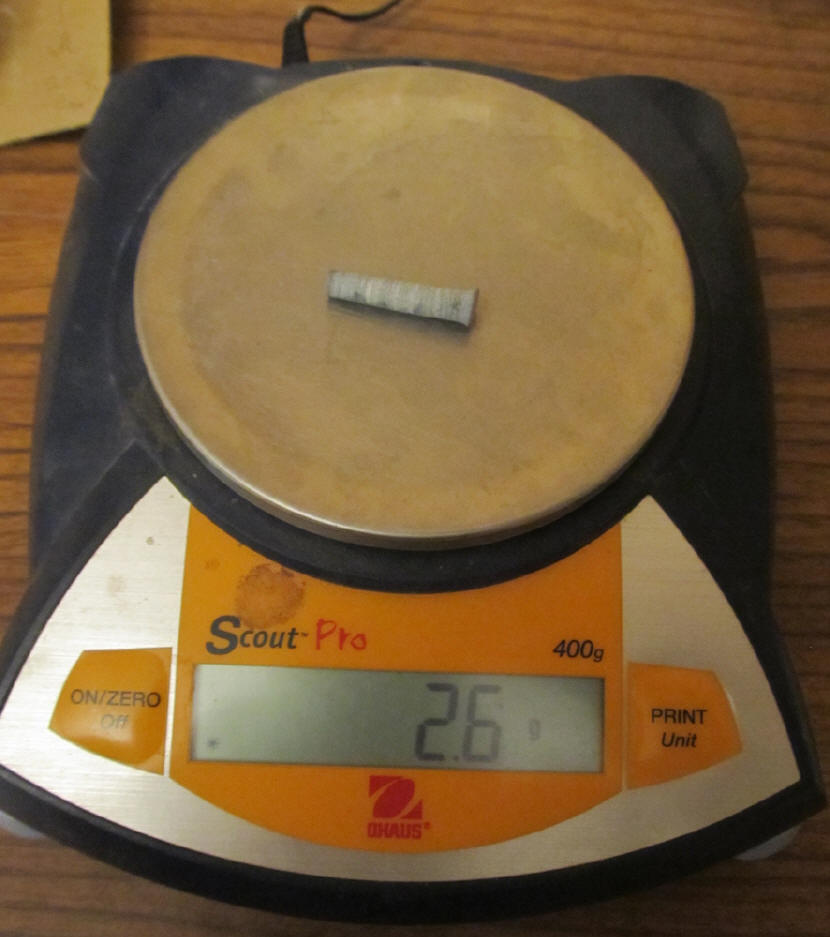 The core weight is 2.6 gr.
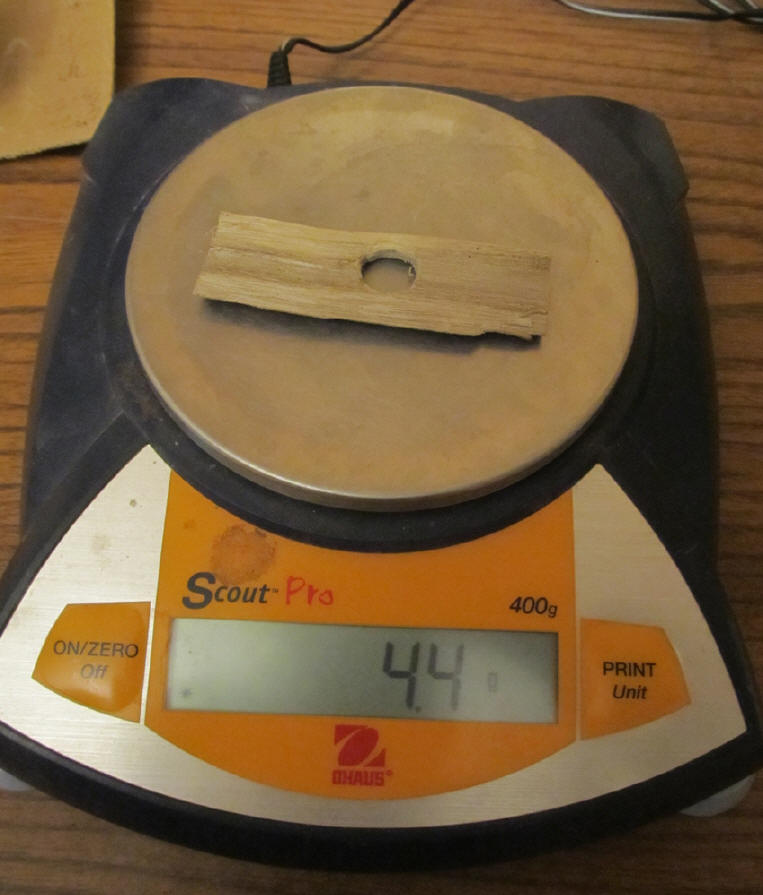 The template weight is 4.4 gr.
Before we continue with the second hole, we will have to confront this problem of the chert dust not staying in place so, we're plugging the hole with clay, in this video. http://www.youtube.com/watch?v=p_AQ2UzGpCE
 Plugging, with clay, from the top.
 ...and the bottom.
In a few days, after Larry's hands and shoulders recover and the clay plug dries sufficiently, the drilling of the adjacent hole will commence.
STAY TUNED!
Preparing for the second hole. http://www.youtube.com/watch?v=Nu2QzFnMpBc
Shimming the plug, for the second hole. http://www.youtube.com/watch?v=riFMabdRzLM
Fitting the template, for the second hole. http://www.youtube.com/watch?v=Z9AxuXWLBW0&feature=youtu.be
Continue to: GENICULATE 2